

Introduction
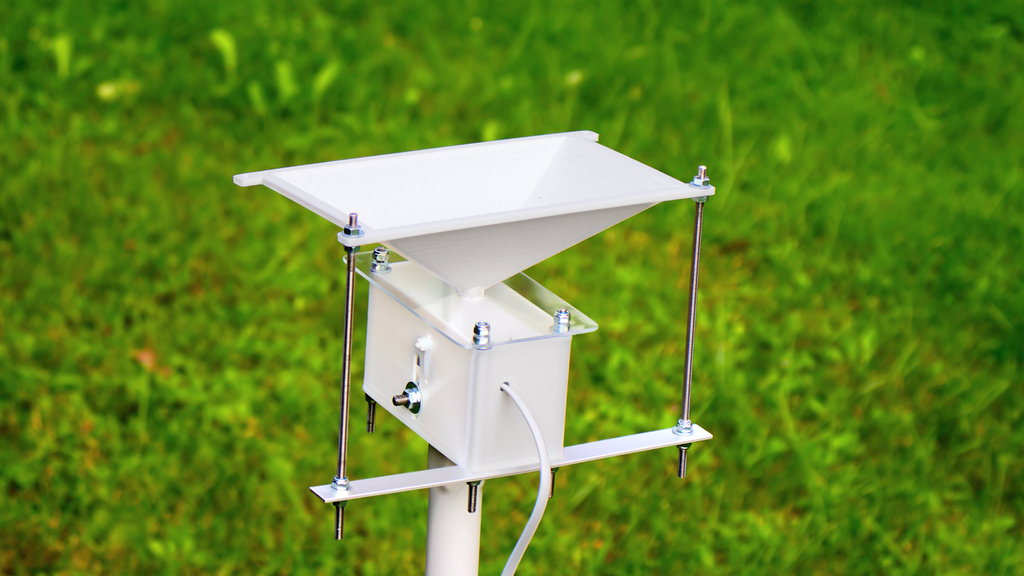
Weather monitoring is crucial for various sectors ranging from agriculture to transportation. In this article, we will guide you through the process of creating a weather center using Arduino, which will collect essential data such as wind speed, humidity, temperature, and rainfall rate. This project will not only provide real-time weather information but also facilitate long-term data analysis for better decision-making.
Components Needed
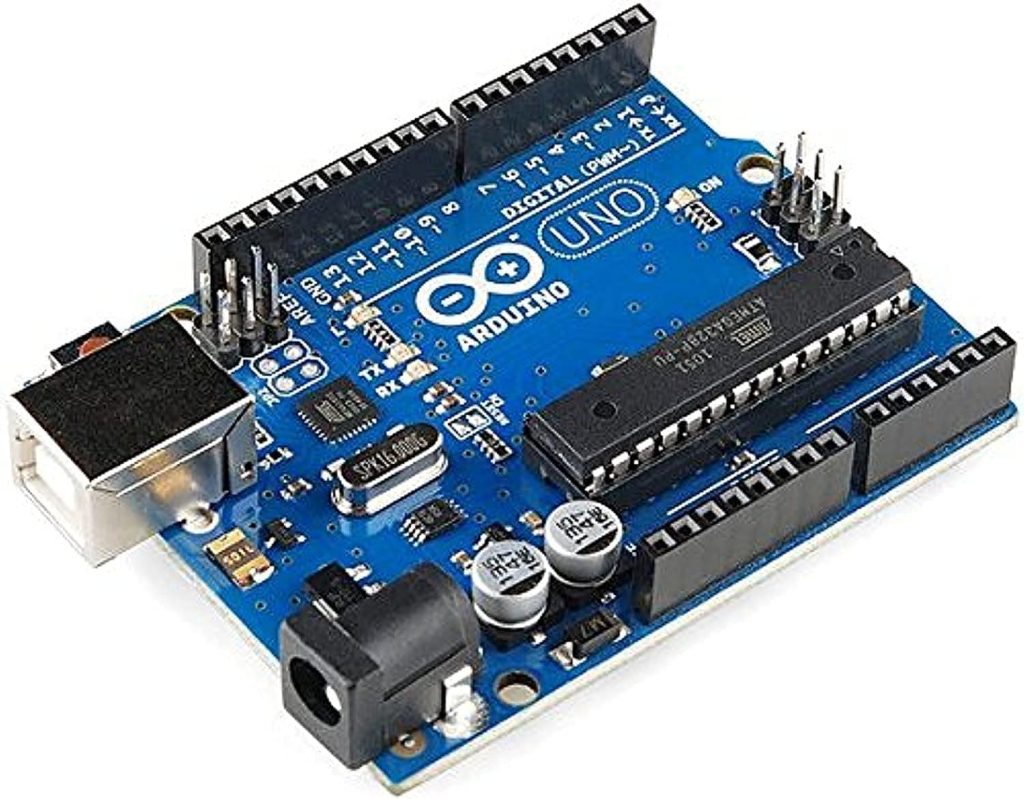
- Arduino Uno (or any compatible microcontroller)
- Anemometer (for measuring wind speed)
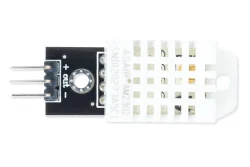
- DHT22 sensor (for measuring humidity and temperature)
- Rain gauge sensor (for measuring rainfall rate)
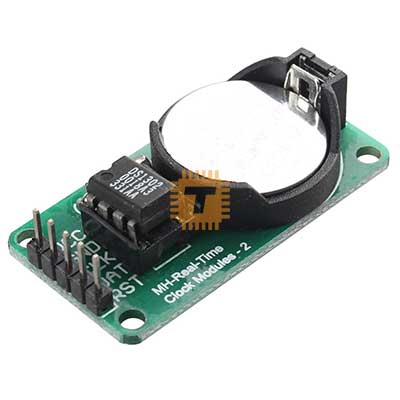
- Real-time clock module (RTC) for accurate timekeeping
- SD card module for data storage
- Wires, breadboard, and necessary tools


Component Connections
- DHT22 Sensor (Temperature and Humidity):
- Connect the VCC pin of the DHT22 sensor to the 5V pin of the Arduino.
- Connect the GND pin of the DHT22 sensor to the GND pin of the Arduino.
- Connect the data pin (out) of the DHT22 sensor to pin 2 of the Arduino.
- Anemometer (Wind Speed Sensor):
- Connect one wire from the anemometer to the VCC pin of the Arduino.
- Connect the other wire from the anemometer to the GND pin of the Arduino.
- Connect the signal wire from the anemometer to any analog pin of the Arduino (e.g., A0).
- Rain Gauge Sensor (Rainfall Rate):
- Connect one wire from the rain gauge sensor to the VCC pin of the Arduino.
- Connect the other wire from the rain gauge sensor to the GND pin of the Arduino.
- Connect the signal wire from the rain gauge sensor to any analog pin of the Arduino (e.g., A1).
- Real-Time Clock (RTC) Module:
- Connect the VCC pin of the RTC module to the 5V pin of the Arduino.
- Connect the GND pin of the RTC module to the GND pin of the Arduino.
- Connect the SDA pin of the RTC module to the A4 pin of the Arduino.
- Connect the SCL pin of the RTC module to the A5 pin of the Arduino.
- SD Card Module:
- Connect the VCC pin of the SD card module to the 5V pin of the Arduino.
- Connect the GND pin of the SD card module to the GND pin of the Arduino.
- Connect the MISO pin of the SD card module to pin 12 of the Arduino.
- Connect the MOSI pin of the SD card module to pin 11 of the Arduino.
- Connect the SCK pin of the SD card module to pin 13 of the Arduino.
- Connect the CS pin of the SD card module to pin 4 of the Arduino.
Make sure to double-check the datasheets of your components and verify the connections with your specific module versions. Also, ensure you have the necessary libraries installed for each sensor and the SD card module.
Implementation Steps
- Connect the sensors and modules according to the circuit diagram.
- Install the necessary libraries for each sensor.
- Write code to initialize sensors, read data, and store it on the SD card.
- Implement code for real-time clock synchronization.
- Test the system to ensure all sensors are functioning properly.
- Deploy the weather center in the desired location.
Advantages of Collecting Weather Data
- Accurate Decision-Making: Access to real-time weather data allows for informed decision-making in various sectors such as agriculture, construction, and aviation.
- Risk Mitigation: Monitoring weather conditions helps in identifying potential risks such as storms, heavy rainfall, or extreme temperatures, enabling timely preventive measures.
- Resource Optimization: Understanding weather patterns enables efficient resource allocation, such as irrigation in agriculture or energy consumption in buildings.
- Forecasting: Long-term data collection facilitates weather pattern analysis, aiding in the prediction of future weather trends and events.
- Research and Analysis: Weather data collected over time can be used for research purposes, climate studies, and trend analysis.
Source Code
#include <SPI.h>
#include <SD.h>
#include <Wire.h>
#include <RTClib.h>
#include <DHT.h>

#define DHTPIN 2
#define DHTTYPE DHT22

DHT dht(DHTPIN, DHTTYPE);

const int windPin = A0; // Analog pin for wind speed sensor
const int rainPin = A1; // Analog pin for rain gauge sensor

RTC_DS1307 rtc;

File dataFile;

void setup() {
  Serial.begin(9600);
  while (!Serial) {
    ; // wait for serial port to connect. Needed for native USB
  }

  if (!rtc.begin()) {
    Serial.println("Couldn't find RTC");
    while (1);
  }

  if (!rtc.isrunning()) {
    Serial.println("RTC is NOT running!");
    rtc.adjust(DateTime(F(__DATE__), F(__TIME__)));
  }

  dht.begin();

  if (!SD.begin(4)) {
    Serial.println("SD card initialization failed!");
    return;
  }
  Serial.println("SD card initialized.");

  dataFile = SD.open("weather_data.csv", FILE_WRITE);

  if (dataFile) {
    dataFile.println("Date,Time,Temperature(C),Humidity(%),WindSpeed(m/s),RainfallRate(mm/hr)");
    dataFile.close();
  } else {
    Serial.println("Error opening file for writing!");
  }
}

void loop() {
  DateTime now = rtc.now();

  float temperature = dht.readTemperature();
  float humidity = dht.readHumidity();
  float windspeed = analogRead(windPin);
  float rainrate = analogRead(rainPin);

  // Convert analog readings to actual values
  windspeed = map(windspeed, 0, 1023, 0, 20); // Assuming wind sensor calibration for 0-20 m/s
  rainrate = map(rainrate, 0, 1023, 0, 10); // Assuming rain gauge sensor calibration for 0-10 mm/hr

  // Print data to serial monitor
  Serial.print(now.year(), DEC);
  Serial.print('/');
  Serial.print(now.month(), DEC);
  Serial.print('/');
  Serial.print(now.day(), DEC);
  Serial.print(',');
  Serial.print(now.hour(), DEC);
  Serial.print(':');
  Serial.print(now.minute(), DEC);
  Serial.print(',');
  Serial.print(temperature);
  Serial.print(',');
  Serial.print(humidity);
  Serial.print(',');
  Serial.print(windspeed);
  Serial.print(',');
  Serial.println(rainrate);

  // Write data to SD card
  dataFile = SD.open("weather_data.csv", FILE_WRITE);
  if (dataFile) {
    dataFile.print(now.year(), DEC);
    dataFile.print('/');
    dataFile.print(now.month(), DEC);
    dataFile.print('/');
    dataFile.print(now.day(), DEC);
    dataFile.print(',');
    dataFile.print(now.hour(), DEC);
    dataFile.print(':');
    dataFile.print(now.minute(), DEC);
    dataFile.print(',');
    dataFile.print(temperature);
    dataFile.print(',');
    dataFile.print(humidity);
    dataFile.print(',');
    dataFile.print(windspeed);
    dataFile.print(',');
    dataFile.println(rainrate);
    dataFile.close();
  } else {
    Serial.println("Error opening file for writing!");
  }

  delay(3600000); // Collect data every hour (3600000 milliseconds)
}
Below is a basic example of Arduino code to collect weather data from sensors and store it on an SD card. This code assumes that you have connected the sensors according to the circuit diagram and have the necessary libraries installed for each sensor.
This code reads data from the DHT22 sensor for temperature and humidity, the wind speed sensor, and the rain gauge sensor. It then writes this data along with the date and time to a CSV file on the SD card.
Make sure to adjust PINs and sensor calibrations according to your setup. Additionally, you may need to adjust the delay time in the loop function if you want to collect data at a different interval.
Data Storage and Database
For this implementation, we will use an SQLite database to store weather data. SQLite is a lightweight, file-based database that is easy to set up and perfect for embedded systems like Arduino. Each factor (wind speed, humidity, temperature, rainfall rate) will have its table in the database, storing records with date, time, and corresponding values.
Conclusion
By building a weather center with Arduino, you can collect essential weather data efficiently and accurately. This data not only aids in immediate decision-making but also contributes to long-term analysis and forecasting. Implementing a data storage solution such as SQLite enables organized and accessible storage of collected data for future reference and analysis.